Compare a brim and a raft for a small part
Understand what each temporary foundation changes before adding material under a small print.
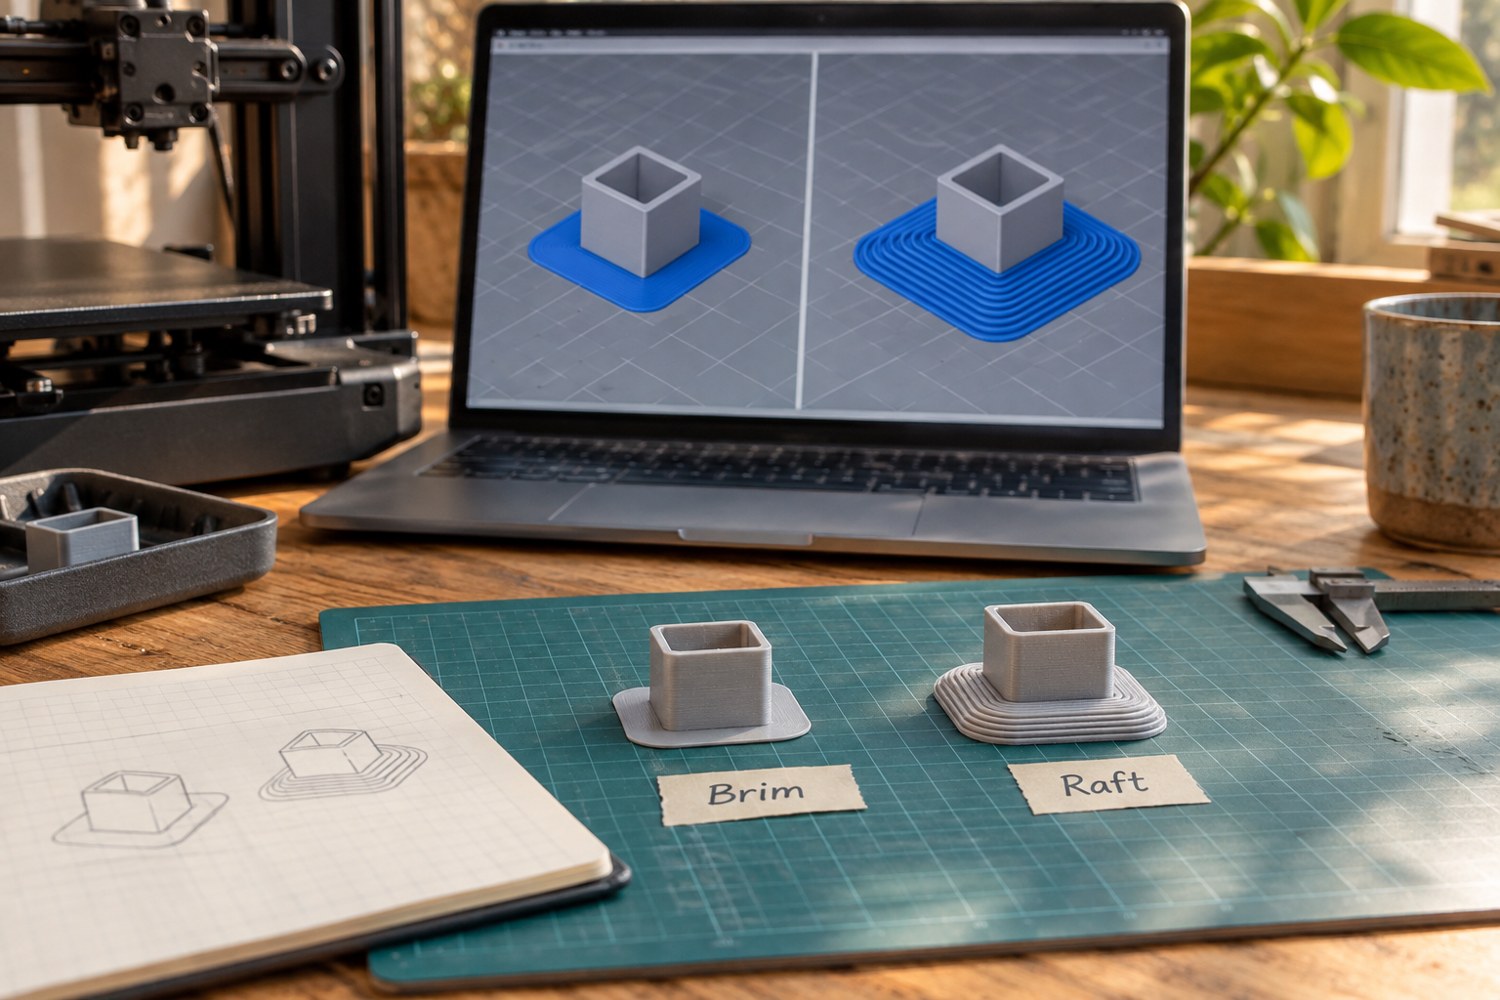
A small upright model can have very little contact with the build plate. A brim and a raft both add temporary material, but they do so in different places. A brim extends around the first-layer footprint; a raft creates a foundation beneath the object. The choice affects cleanup, the underside of the part and the amount of material used.
Start with a clean, correctly prepared surface and the appropriate printer profile. Temporary foundations should not conceal an unresolved machine or surface problem. If a simple known model also fails in the same location, investigate that before adding a large raft to every new object.
For a narrow tower with an otherwise suitable flat base, preview a brim first. Look at where its extra footprint sits and whether it merges with neighbouring parts. Consider how you will trim it without cutting into the model's bottom edge. A brim around delicate feet can be more awkward to remove than one around a solid circular plinth.
A raft places the object above generated support material. Inspect the interface beneath the object and think about whether that surface must later fit flat against another component. If it is a visible underside or a dimensioned mating surface, the cleanup burden may outweigh the convenience. Record the profile used rather than assuming all raft settings behave the same way.
Make a comparison on one representative piece when the answer is uncertain. Keep the geometry, material and orientation constant. Compare whether the part stays in place, how much effort removal takes and whether the finished base still meets its purpose. The version with the cleanest removal may be preferable even if the sliced time is slightly longer.
Also consider changing the model's orientation or adding a removable design feature. A tiny figurine might print more predictably attached to an intentional temporary base that can be cut away at a planned location. That is a modelling decision, not a reason to force an unsuitable raft onto an inaccessible shape.
Save the successful setup with a note about the object it was tested on. “Brim used for narrow tower footprint” tells you why the setting exists. The next broad, flat terrain tile may need neither option. Treat foundations as responses to particular geometry, and examine the bottom of the finished part as carefully as the attractive top.
Another detail to explore
Choose a first 3D printer around the objects you want to make
Start with three objects, their dimensions and the space available for making them. Those decisions narrow the printer search before speed claims do.
Read article
Read a sliced preview before starting a print
Read the toolpaths, first layer and delicate features before a file reaches the printer.
Read article