Decide when a model needs support
Find unsupported starts and plan how supports will be removed from the finished object.
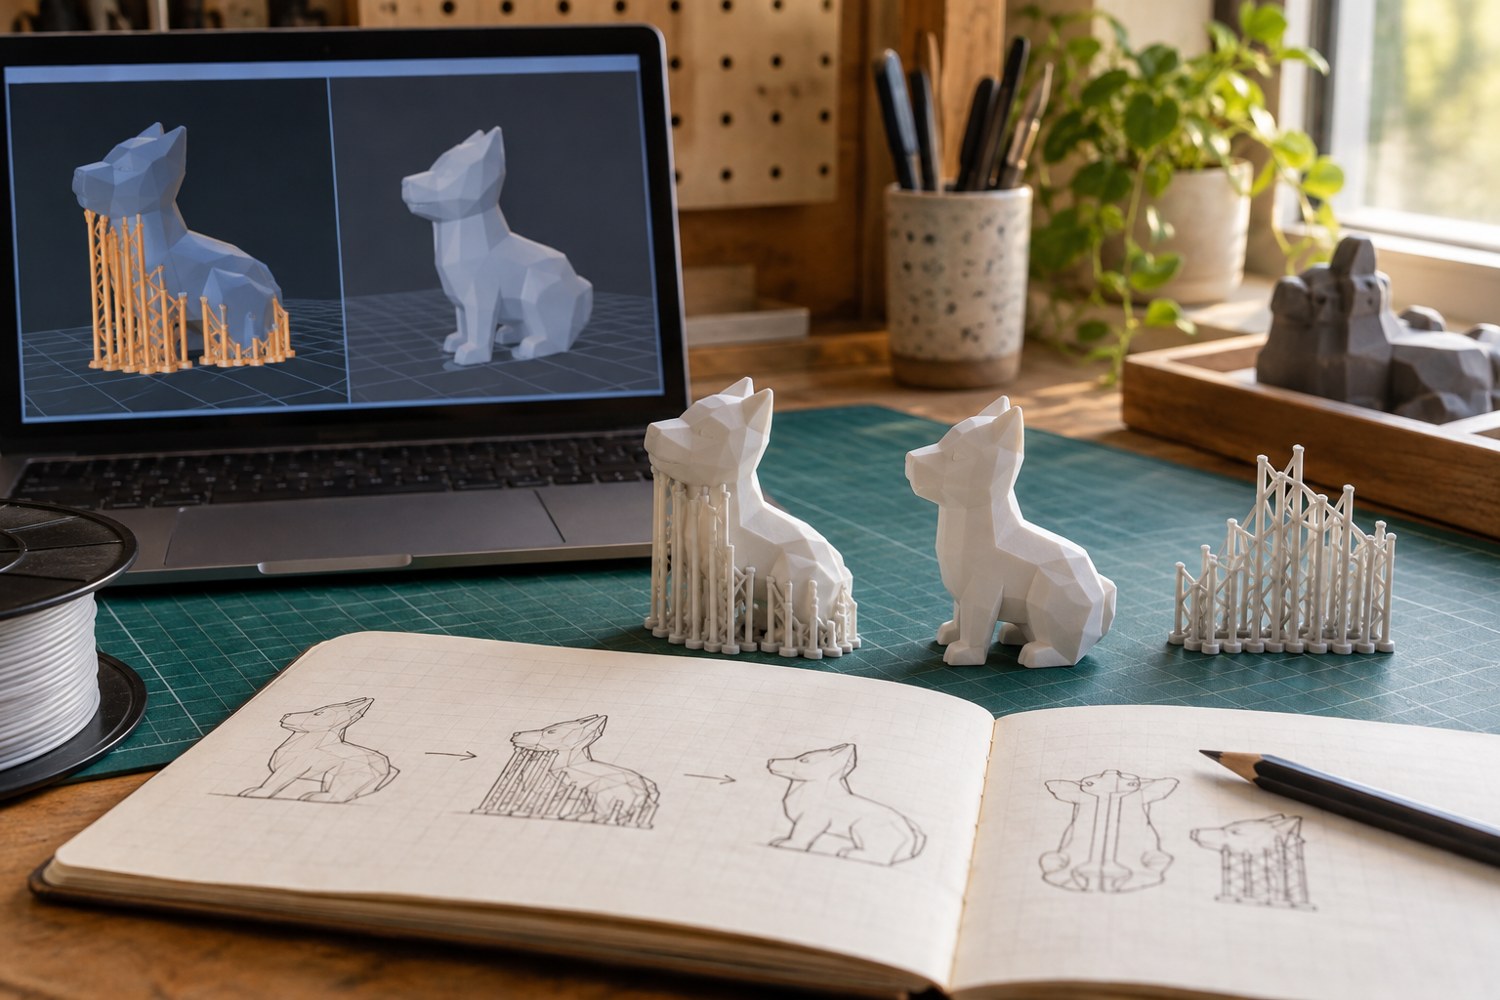
Support decisions begin with geometry. Imagine a tiny building appearing one layer at a time. Its walls grow from earlier walls, but the underside of an outward balcony may begin where no model exists below it. A slicer can add temporary material in that region. The presence of an overhang, however, does not mean that every automatic support suggestion is the best arrangement for the model.
Prusa's support guidance recommends considering a different orientation or splitting the model to reduce support needs. Use that as a design question. Could the balcony be a separate part? Could the roof print upside down and attach later? A small joining operation may be easier than cleaning an inaccessible underside, although it introduces its own alignment and finishing work.
Inspect the first unsupported layer
Move through the preview until the feature begins. Distinguish a bridge between existing surfaces from an isolated piece starting in empty space. Then inspect the support path all the way down. A column may start on the plate, or it may stand on another model surface. That lower contact area matters if it is a visible roof tile or a narrow window frame.
Use the slicer's support controls to compare a broad automatic arrangement with a more selective one. Do not remove a support simply because it looks untidy in the preview. Identify what it carries and what will replace it if you exclude it. There is no universal overhang angle that removes the need to consider material, cooling, geometry and the printer's established profile.
Plan the removal route
Before starting the print, trace how each support will leave the object. A support trapped inside a closed hollow shape is a design problem. A support behind a fragile railing may be accessible only at the cost of breaking the railing. Consider splitting the object at a hidden seam or enlarging an access opening before committing to the full print.
For a delicate feature, make a small sample that contains the same support interface. Let it cool and remove support using suitable tools, eye protection and a controlled work position. Keep hands out of the cutting path and do not twist a narrow detail as a lever. The question is not only whether the feature prints, but whether it survives cleanup in a usable condition.
Retain the version that balances printing and finishing. Save the support settings inside the project file, not only in a screenshot. If the geometry changes, inspect the supports again: a moved roof or thicker wall can change the generated structure. A support arrangement belongs to a particular model and orientation, rather than being a reusable stamp of approval for every later revision.
Another detail to explore
Choose a first 3D printer around the objects you want to make
Start with three objects, their dimensions and the space available for making them. Those decisions narrow the printer search before speed claims do.
Read article
Read a sliced preview before starting a print
Read the toolpaths, first layer and delicate features before a file reaches the printer.
Read article